REJECTED WORK - REASON - PLOSIVES
HI,
I had email asking me to join this community and share a couple of rejected work audios which contained plosives. Could someone have a listen and see if they can hear them and what I can do to reduce the problem? Thank you 😊
I obviously voice work outside the VB platform and I never get this feedback so it’s a new one on me. I sit far back from the mic and dip my mouth away from the mic when voicing all the P words. My mic - Rode NT1 A is a very ‘bright’ mic for my type of tone so I am currently saving up for a new denser sounding mic which I think will help.
Here are the links:
Many thanks
Katie
Please sign in to leave a comment.
Hi Katie, thanks for reaching out!
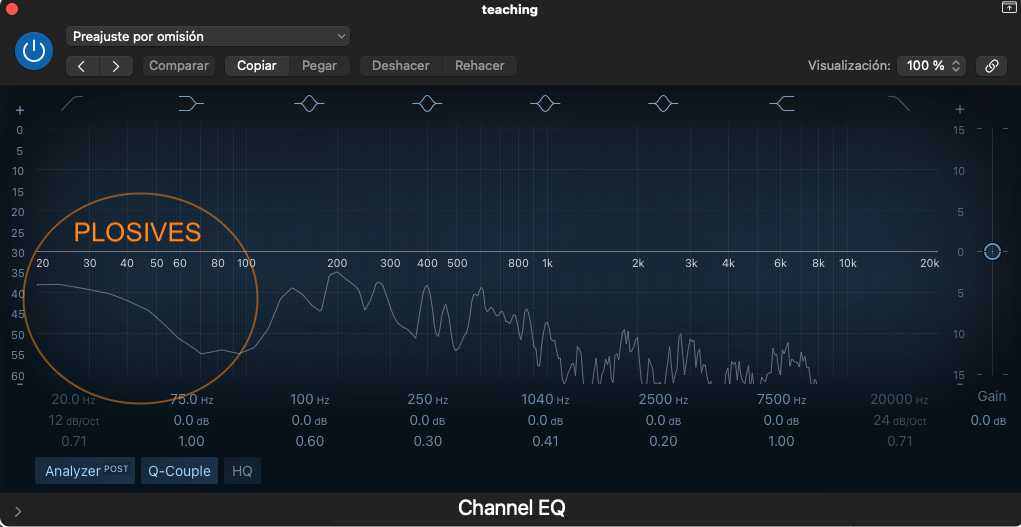
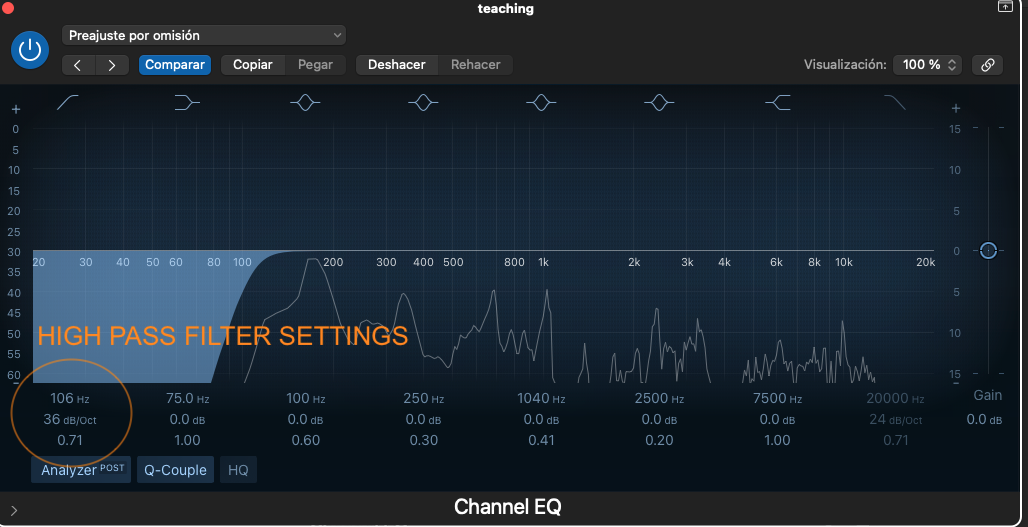
I listened to your audios, and indeed there are some plosives that can be easily fixed. To be more visual, I took a screenshot of the frequency response of your "teaching" audio. You can see that below 100 Hz, there is sound information precisely corresponding to the plosives, which can be easily eliminated with a high-pass filter, as you can see in the second image.
So, I suggest that you use an equalizer in your audio editor and activate the high-pass filter with a setting similar to what I show you in the image, and that should be enough.
I hope I have been clear with the explanation, and I look forward to your response.
Best regards,
Steven!
Hi Steven,
Thank you so much for your feedback. I use Adobe Audition and this is what I see when I click on the High Pass Filter option. How would I translate what you’ve shown me in your examples to my software? This is what it is currently reading at now.
Or there's this...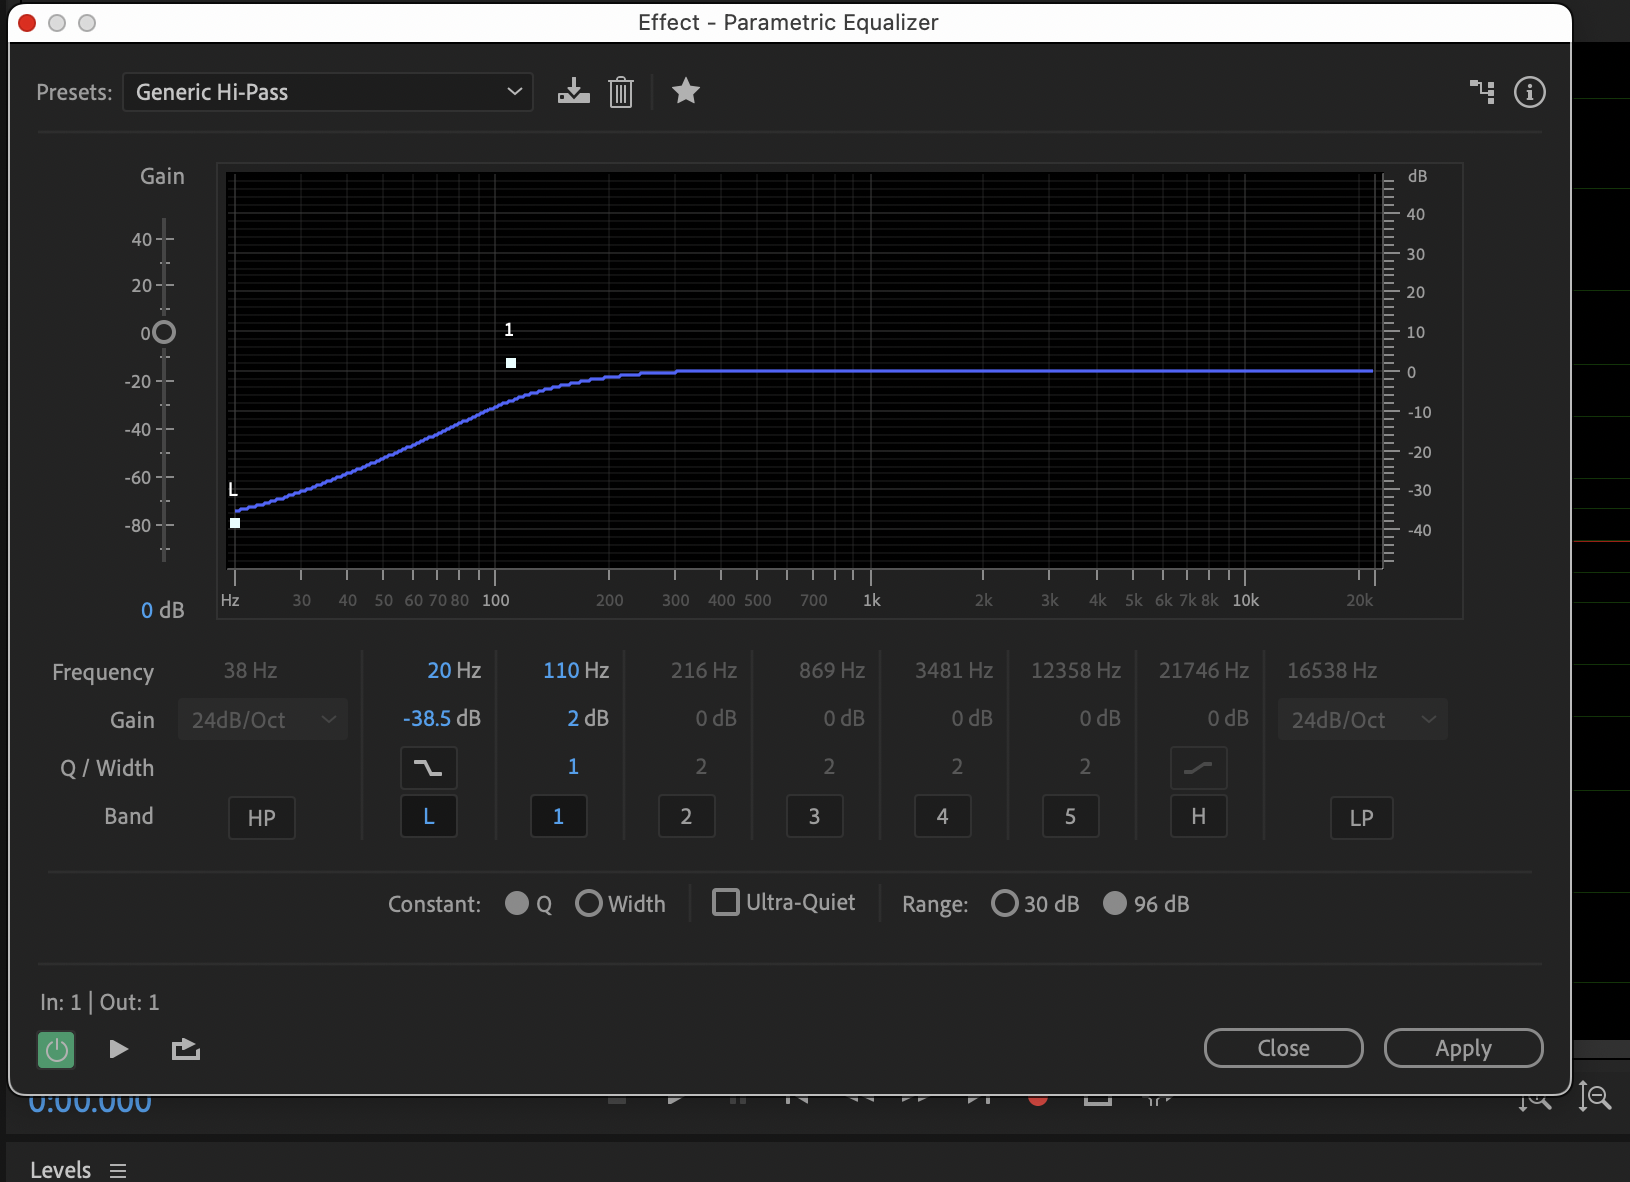
is this correct?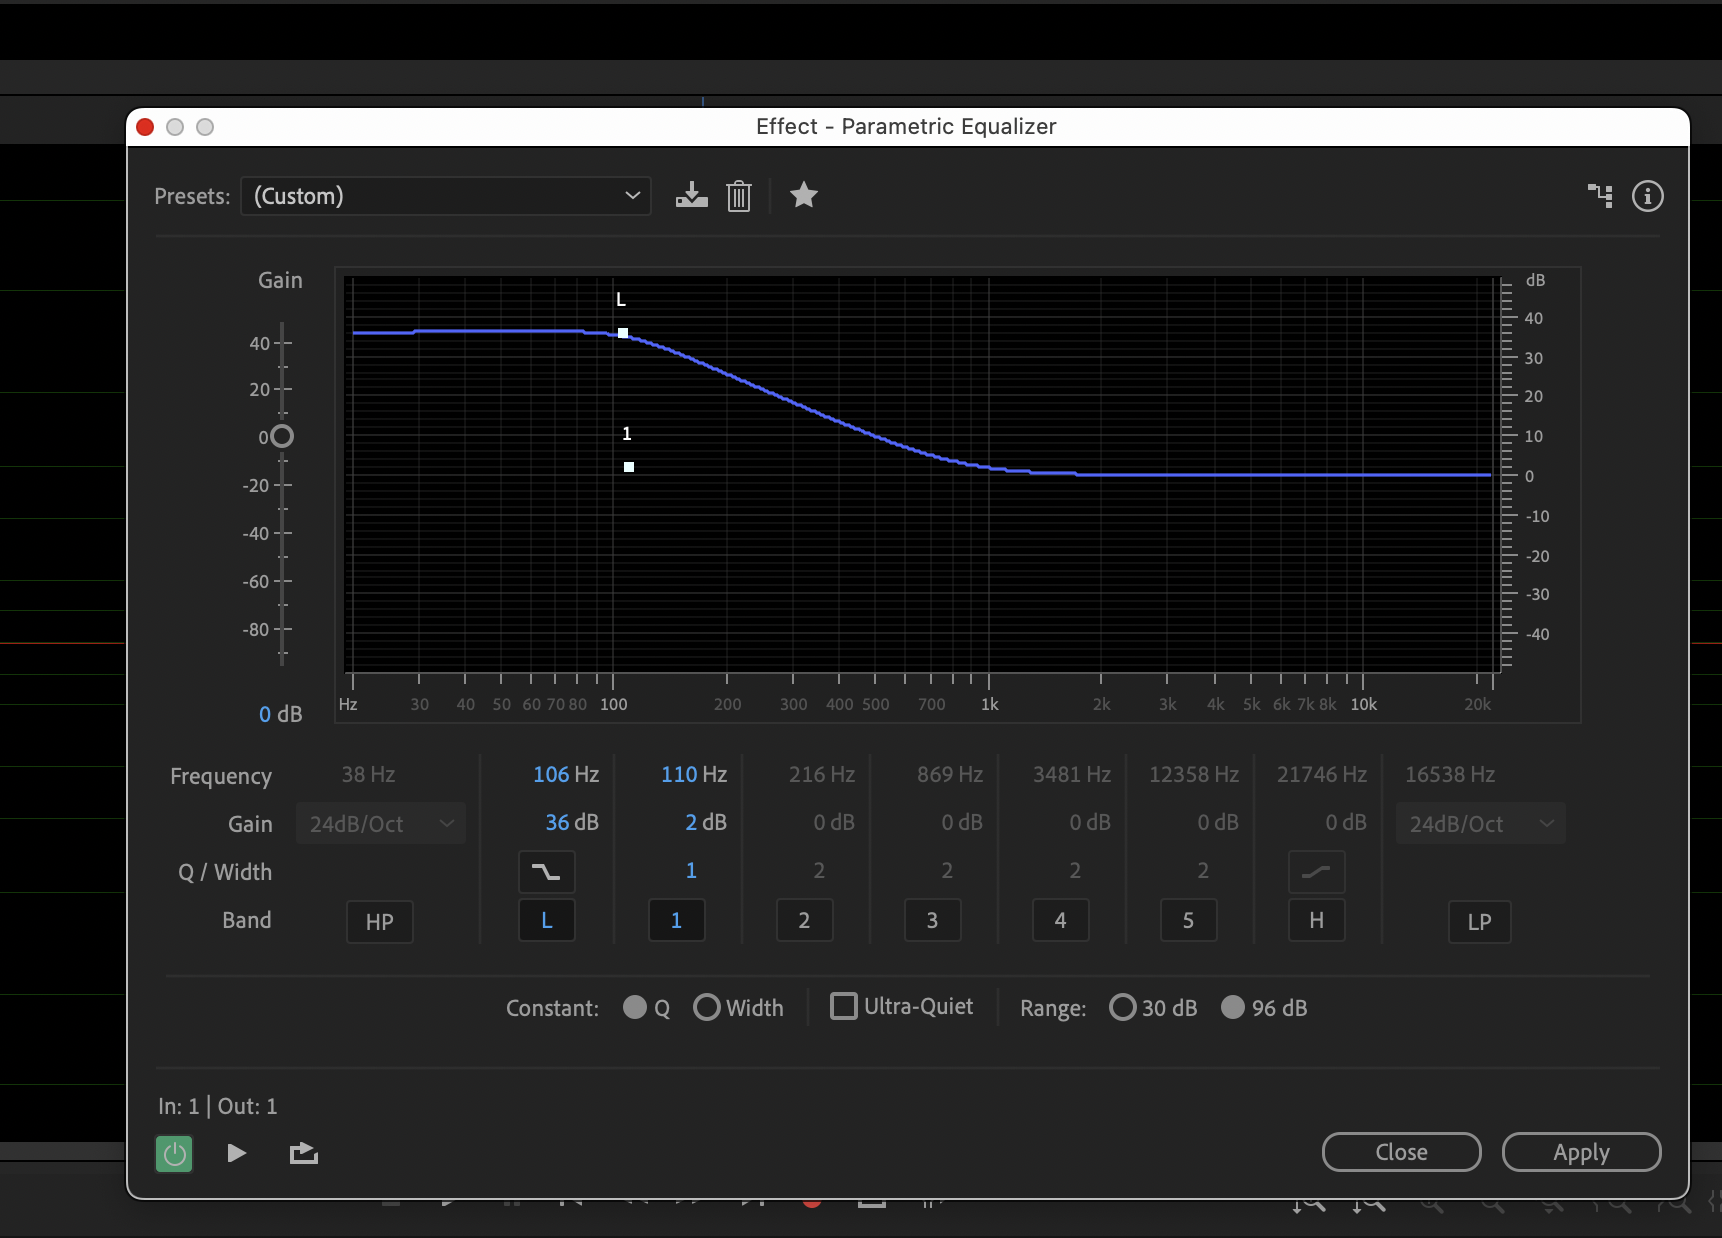
Hi Katie! Another VB Pro here...
In Adobe Audition, the best high-pass filter option to use is with the parametric equalizer. To activate it, click on the "HP" (high pass).
Above it, you'll see a numbered frequency in hertz. This is where you tell Adobe where you want the audio signal to be attenuated. In my example, it's at 90Hz, which is a good starting point.
Aside from reducing the sound of plosives, a high-pass filter can also reduce other unwanted low frequency sounds, such as the rumble of an air conditioner or furnace, or street traffic from outside of your studio. Just be careful to not set the frequency to high, or you'll cut off the good parts of the audio that add body and warmth to your voice. Start at 90Hz, and increase that number only if you still notice plosives in your recording.
Good luck!
Chuck
This is so helpful!! I have managed to replicate mine from your diagram. Thank you so much, Hopefully that will be the end of the issue.
Life saviour!
Hi Chuck, Me again!
I wanted to ask if you know how I can save this High Pass setting so that I don't have to click on 'apply' every time. I need it to be the default setting now for all my VO work? Is this an easy fix?
Many thanks!
Katie
HI Katie!
Have a look in the upper left corner... you'll see the drop down menu for saved presets. To the right of that you'll see a graphic of an arrow pointing down at a hard drive. Click on that, and you'll be able to save your setting. Name it something easy like "Katie's high pass setting" and you'll be able to select it from that drop down menu whenever you want to use it.
This is great! Thank you so much, It worked!!
You're welcome!